怪物猎人:世界MOD Swimsuit for Underwear or Samurai
MOD介绍:
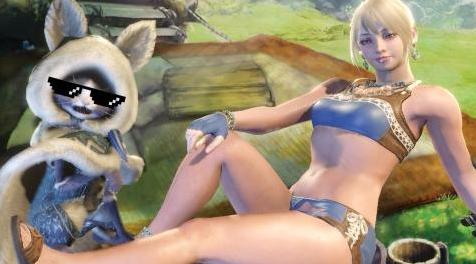
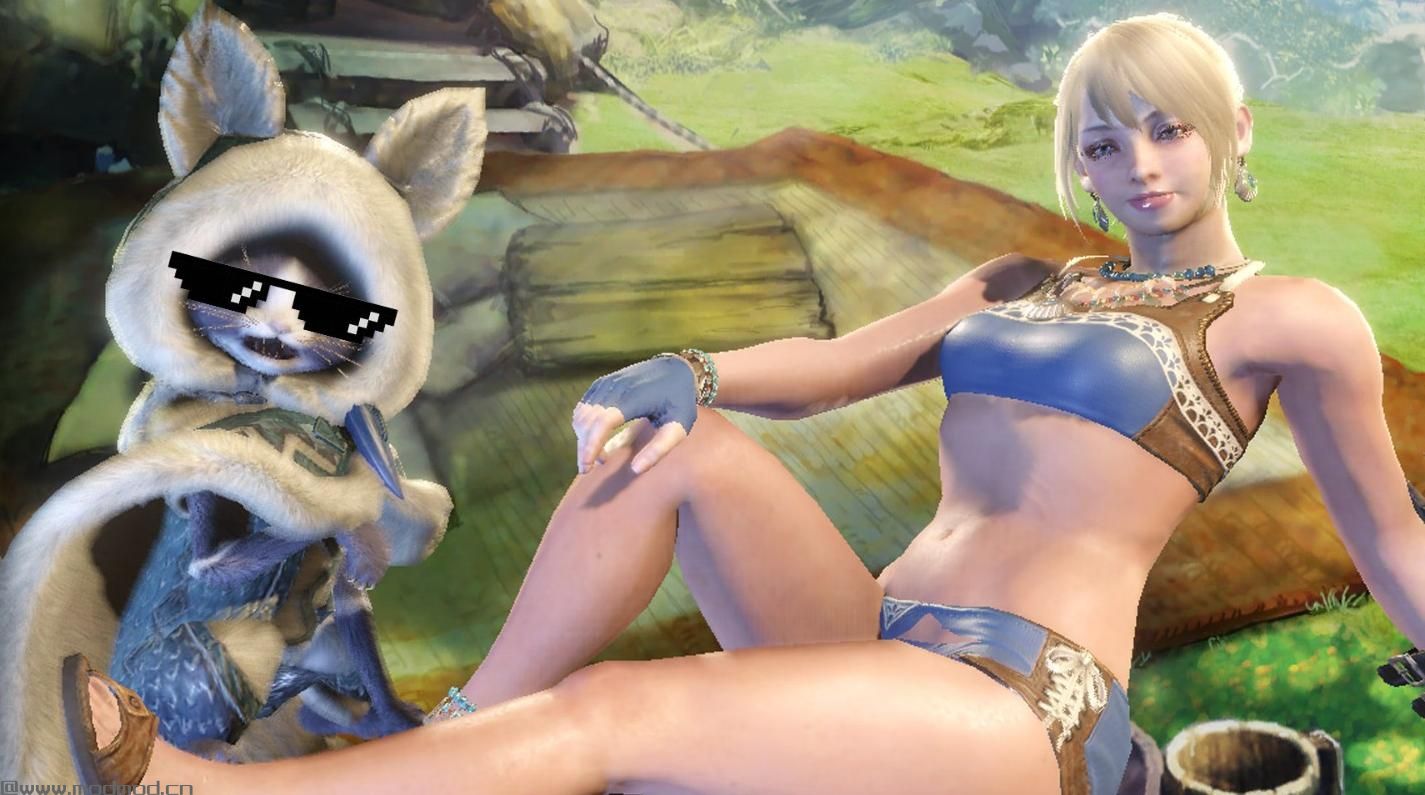
这取代了其中一种内衣类型,或武士层状盔甲,与泳衣。您可以更改颜色,混合和匹配身体部位。我删除了鲜花和其他部分。我正在考虑将腰部换成古代,并添加一个覆盖花朵的头部选项。
Samurai分层装甲未经测试(我没有),但它应该工作。
错误:
- 短裤穿过骨盆区域。这就是Capcom的成功方式。在我们获得完整的模型导入/导出之前,我不知道如何解决它。
- 与其他模型交换会影响可自定义的颜色。
- 耳环是胸部的一部分,可以用头盔夹住。如果我试图将它们移除,它也可能会移除整条项链。
- 可能的皮肤闪烁。可能只有在多人使用被泳衣取代的服装时才会出现。稍后会检查。
*修正了破碎的阴影。我认为它没有那么长的时间。
*所有LOD都应该修复。有关如何修复它的详细信息,请参阅下文。
*修正了肤色定制。有关如何编辑mrl3的图像,请参见图库,有关说明,请参阅下面的文字。
安装:
只需将文件(NativePC)解压缩到Steam \ Steamapps \ common \ Monster Hunter World \
如果你知道哪个装甲是哪个,你可以用这个模型交换其他装甲。
当Vuze发布他的自定义分层装甲工具时,您应该能够将其设置为分层装甲。
卸载:
如果要还原为原始文件,只需删除NativePC \ pl \ f_equip \ pl501_0000 \中的mod文件
或者,如果您使用Samurai版本,请删除NativePC \ pl \ f_equip \ pl067_0000 \中的mod文件
可选的:
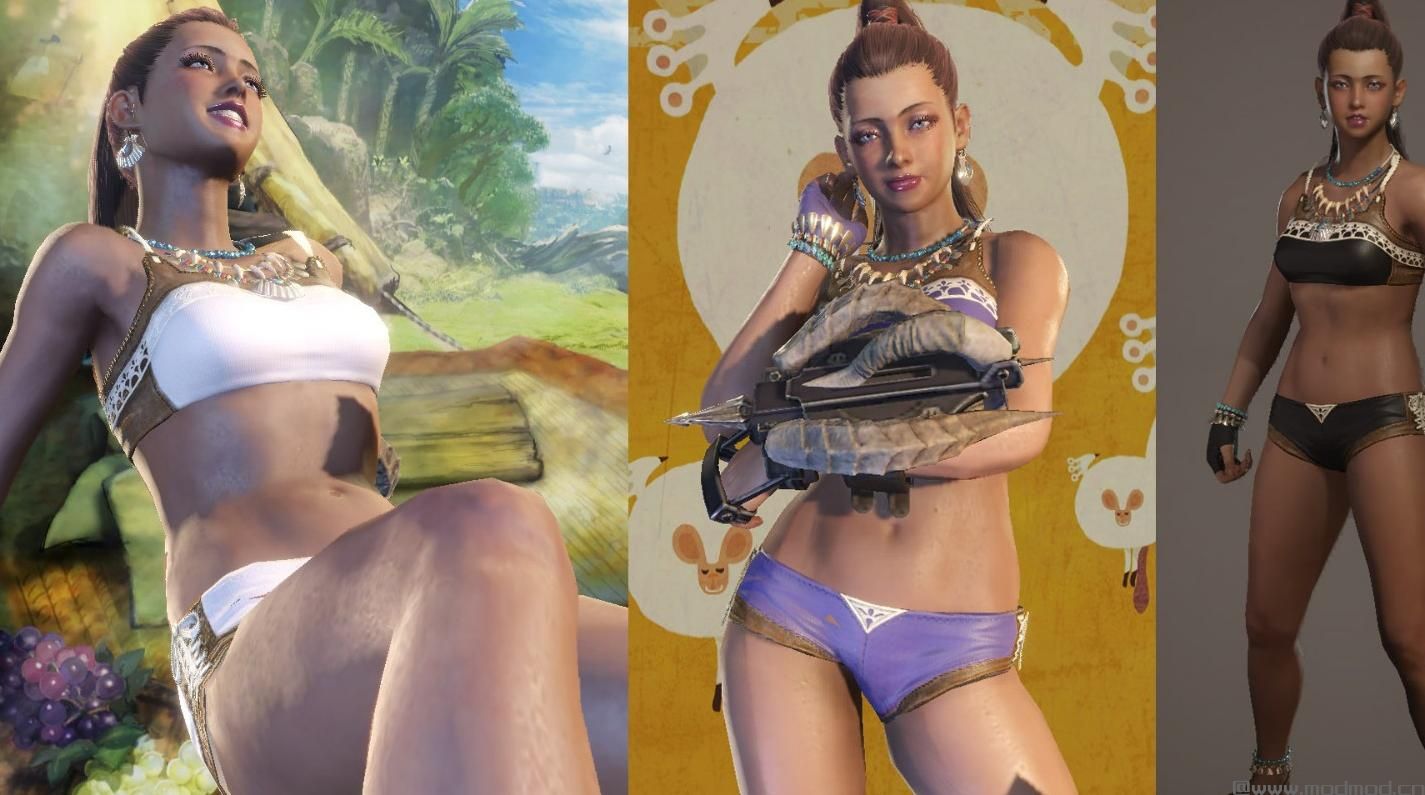
当你覆盖一些不能让你自定义正确颜色的东西时,我已经制作了一些可选的纹理。请注意,这些也将覆盖NPC的可自定义颜色。我可以稍后更改纹理参考位置。
感谢Vuze用于解包工具,以及用于TEX转换器的daemon1。此外,感谢MHWTexConvert(它适用于CMM BC7)。
我很长时间没有发布mod。如果我搞砸了某个地方,请随时告诉我。
我如何擦除网格,设置材质,定义LOD,更改网格地址参考:
在mod3中,在材料名称之后,它指的是模型的每个部分。每个条目80个字节。如果用00替换这80个字节,则无法找到模型,因此它将被隐藏。您也可以通过将LOD设置为00来隐藏它。
我之前说的第6个字节是材质ID。我不知道为什么写这个。无论如何,我重写了解释。
样品条目:
00 00 00 00 00 00 00 00 00 00 00 00 00 00 00 00
13 00 AE 0B 00 00 00 00 01 00 00 00 21 00 24 43
00 00 00 00 00 00 00 00 1C 40 37 F6 00 00 00 00
4C 3E 00 00 00 00 00 00 00 24 01 00 00 00 AD 0B
FF FF FF FF 00 00 00 00 00 00 00 00 00 00 00 00
值得注意的字节:
QQ QQ 00 00 00 00 00 00 00 00 00 00 00 00 00 < - 这里有时会有字节,我不知道它们是为了什么
13 00 PP PP 00 00 MM 00 LL 00 00 00 21 00 24 43
00 00 00 00 00 00 00 00 1C 40 37 F6 XX XX XX XX
YY YY YY YY 00 00 00 00 00 24 01 00 00 00 AD 0B < - 不知道这里的这些字节是什么
FF FF FF FF 00 00 00 00 00 00 00 00 00 00 00 00 < - 这里有时会有字节,我不知道它们的用途是什么
我不知道QQ QQ和PP PP是什么,但QQ QQ似乎总是匹配以前的入门PP PP,除了第一次入场的情况。
我还没弄清楚其他字节的作用,但摆弄它们往往会导致崩溃。
MM是材料ID。它使用文件中前面列出的材料的顺序。更改值,您将看到纹理将更改。
LL定义LOD。 00 =无形。 01 =创建字符,装备盒子。 02 =在游戏中。其他价值似乎包括08等。不知道它们是什么。
要获得无限LOD,我只需将此值设置为FF。我不确定是否使用相同的值来定义阴影(尚未测试)。
XX XX XX XX是要查找的网格的起始位置。例如,如果XX XX XX XX是43 21 00 00,则地址是00001234。
初始地址似乎总是00 00 00 00,所以我假设网格数据总是在某个地方之后开始(即在这个材料索引之后?)
YY YY YY YY似乎是网格的大小。在上面的例子中,它是4C 3E 00 00,这意味着00003E4C。减小此值将删除三角形。
要获取下一个网格的起始地址,请使用XX XX XX XX并添加YY YY YY YY。
在上面的示例中,00000000 + 00003E4C表示下一个网格将从00003E4C开始。
当您想测试结果时,只需在设备箱中闲逛并打开和关闭设备即可。
要测试LOD,请将LOD设置为低,将摄像机距离设置为远,然后进入训练模式并在Wedge Beetle上摆动。
不要忘记检查阴影以查看阴影LOD是否也正常工作。
在查找MRL格式信息时,我发现了以前的MOD格式规范:
residentevilmodding#boards#net/thread/6320/capcoms-mtframework-mod-format-research
有关可定制皮肤和设备颜色的信息:
CMM tex定义纹理的哪些部分是可自定义的颜色。通常是红色或绿色。这通常用于设备。
游戏决定哪种颜色可以在一台设备上定制。我怀疑这是在common / equip_scolor.esvc中定义的
对于皮肤,皮肤材质在mrl3文件材质索引中有一个着色器开关,告诉游戏它们是播放器或NPC皮肤材质。
皮肤材质通常指默认或常见的玩家皮肤纹理。还有手纹理。
在NPC服装的情况下,有时皮肤被吸引到衣服质地上。
但即使在单个NPC纹理同时具有衣服和皮肤的情况下,皮肤也被赋予其自己的材料。
假设你的皮肤材料没有变色。您需要在mrl3文件中找出它们。
“default_tex \ skin_BM”似乎用于更改肤色。
找到蒙皮材料的关键是搜索使用此纹理的材质。
您可以通过计算纹理的数量顺序然后使用该数字搜索材料来完成此操作。
例如,如果纹理列表中的“default_tex \ skin_BM”为第13个,则其值为0D。在材料索引后搜索0D。
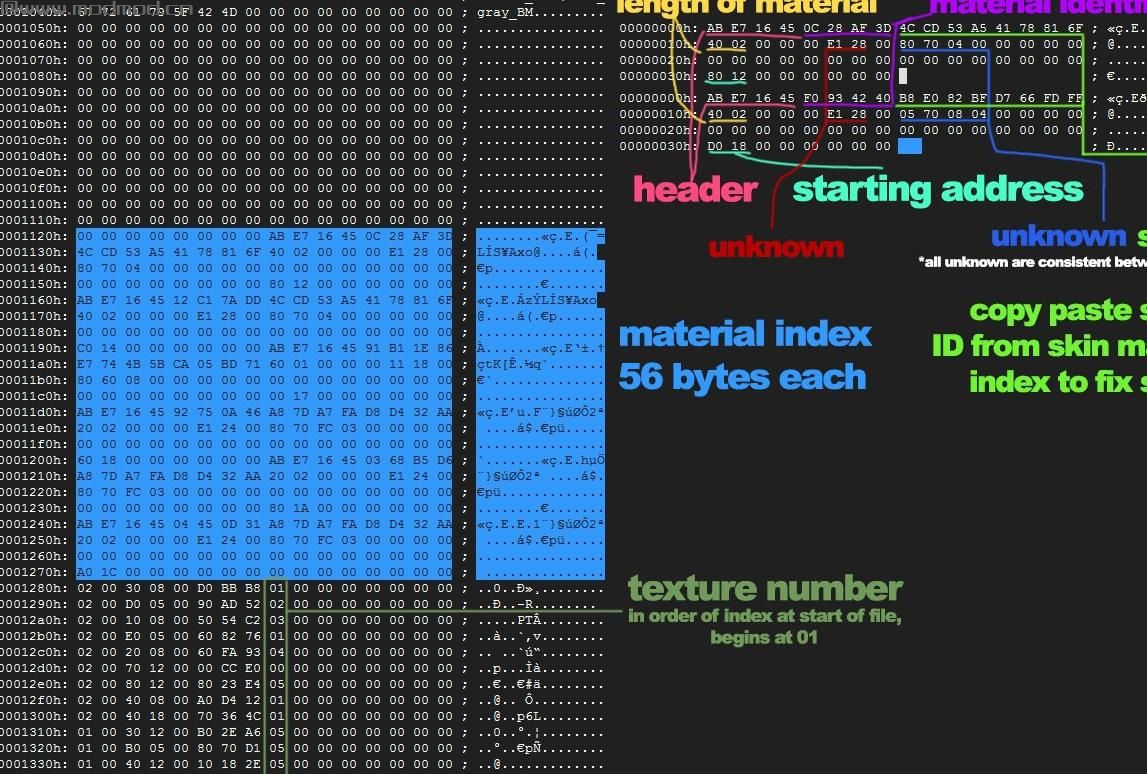
您可以使用我上传的mrl3图像找出材料的起始位置和它们的长度。
您还可以通过在同一材料中使用的其他纹理来确定哪种材料。
例如,使用手纹理意味着它是用于手的材料。
请注意,位置和大小的字节是相反的。例如,在mrl3图像的右上角,4002是长度。
那是0240的hex.Write 0240进入Windows计算器(十六进制模式)然后转换为十进制。结果是576个字节。
因此,材料大小为576个字节。同样,如果位置为1280,则意味着它从0x00001280开始。
一旦你弄清楚哪些材料是皮肤材料,只需从播放器mrl3的确认皮肤材料中复制粘贴绿色“皮肤ID”部分。
使用我上传的图像,您还应该能够执行诸如将材质附加到mrl3文件末尾,然后编辑现有材质的地址和大小参考以指向附加材料的操作。请注意,您必须保留材质ID(我假设它们是基于MarioKart64n的RE6 mod工具的视频),以便模型知道您所指的材料。否则游戏可能会崩溃。
如何果照(没有纹理,即缺少乳头):
在十六进制编辑器中打开f_body501_000.mod3,并将00000067F0替换为0000673F,将0x00006790替换为000067DF,并使用00字节。
这应该删除衬衫。去除短裤会留下空隙。
我不打算做一个果露的纹理(懒惰),所以如果你想要继续做一个。
This replaces one of the underwear types, or the Samurai layered armor, with the swimsuit. You can change the color, and mix and match body parts. I removed the flowers and other parts. I am considering switching the waist out for the paleo, and adding a head option that covers the flowers.
Samurai layered armor is untested (I don't have it) but it should work.
Bugs:
- The shorts clips through the pelvis area. That's how Capcom made it. Until we get full model import/export, I don't know how to fix it.
- Swapping with other models affects which color is customizable.
- Earrings are part of the chest, and may clip with head armor. If I try to remove them, it may remove the entire necklace too.
- Possible skin flashing. May only occur if multiple people are using the outfit that was replaced with swimsuit. Will check later.
* Fixed the broken shadows. It didn't take as long as I thought it would.
* All LODs should be fixed. See below for full details of how I fixed it, and more.
* Fixed the skin color customization. See the image gallery for an image of how to edit mrl3, and text below for explanation.
Installation:
Simply unzip the files (with folders) into Steam\Steamapps\common\Monster Hunter World\
If you know which armors are which, you can model swap other armors with this.
When Vuze releases his custom layered armor tool, you should be able to set this up as a layered armor.
Uninstallation:
If you want to revert to the original, simply delete the mod files in NativePC\pl\f_equip\pl501_0000\
Or if you used the Samurai version, delete the mod files in NativePC\pl\f_equip\pl067_0000\
Optional:
I've made some optional textures for when you're overriding something that won't let you customize the correct color. Note that these will override the customizable color for the NPCs as well. I may change the texture reference locations later.
Thanks to Vuze for the unpacking tools, and daemon1 for the TEX converter. Also, thanks to MHWTexConvert (it works with the CMM BC7).
I haven't posted a mod for a very long time. Feel free to let me know if I've screwed up somewhere.
How I erased the mesh, set material, defined LOD, changed mesh address reference:
In mod3, after the material names, it refers to each part of the model. 80 bytes for each entry. If you replace those 80 bytes with 00s, it can't find the model, so it becomes hidden. You can also hide it by setting LOD to 00.
I previously said 6th byte was material ID. I don't know why I wrote that. Anyway, I rewrote the explanation.
Sample entry:
00 00 00 00 00 00 00 00 00 00 00 00 00 00 00 00
13 00 AE 0B 00 00 00 00 01 00 00 00 21 00 24 43
00 00 00 00 00 00 00 00 1C 40 37 F6 00 00 00 00
4C 3E 00 00 00 00 00 00 00 24 01 00 00 00 AD 0B
FF FF FF FF 00 00 00 00 00 00 00 00 00 00 00 00
Notable bytes:
QQ QQ 00 00 00 00 00 00 00 00 00 00 00 00 00 00 <- there are sometimes bytes at the end here, I don't know what they're for
13 00 PP PP 00 00 MM 00 LL 00 00 00 21 00 24 43
00 00 00 00 00 00 00 00 1C 40 37 F6 XX XX XX XX
YY YY YY YY 00 00 00 00 00 24 01 00 00 00 AD 0B <- don't know what these bytes on the end here are for
FF FF FF FF 00 00 00 00 00 00 00 00 00 00 00 00 <- there are sometimes bytes at the end here, I don't know what they're for
I do not know what QQ QQ and PP PP are, but QQ QQ always seems to match the previous entry's PP PP, except in the case of the first entry.
I have yet to figure out what the other bytes do, but fiddling with them tends to cause crashes.
MM is the material ID. It uses the order of the materials listed earlier in the file. Change the value and you'll see the texture will change.
LL defines LOD. 00 = invisible. 01 = char creation, equip box. 02 = in-game. Other values seem to include 08, etc. Don't know what they are.
To get infinite LOD, I just set this value to FF. I'm not sure if this same value is used to define the shadow (haven't tested).
XX XX XX XX is starting location of the mesh to look for. For example, if XX XX XX XX is 43 21 00 00, then the address is 00001234.
Initial address always seems to be 00 00 00 00, so I'm assuming mesh data always starts after a certain place (ie. after this material index?)
YY YY YY YY seems to be the size of the mesh. In the above example, it's 4C 3E 00 00, which means 00003E4C. Reducing this value removes triangles.
To get the starting address of the next mesh, you take XX XX XX XX and add YY YY YY YY.
In the above sample, 00000000 + 00003E4C means the next mesh will start at 00003E4C.
When you want to test the results, just hang out at the equipment box and switch equipment on and off.
To test LOD, set LOD to low, and camera distance set to far, then go to training mode and swing on the Wedge Beetle.
Don't forget to check the shadows to see if the shadow LOD is also working properly.
While looking up MRL format info, I found past MOD format specifications:
residentevilmodding#boards#net/thread/6320/capcoms-mtframework-mod-format-research
z13#invisionfree#com/Translation_Forum/ar/t26.htm
Information about customizable skin and equipment color:
CMM tex defines what parts of a texture are color customizable. Usually red or green. This is usually for equipment.
The game decides which color is customizable on a piece of equipment. I suspect this is defined in common/equip_scolor.esvc
For skin, skin materials have a shader switch in the mrl3 file material index, that tells the game they are a Player or NPC skin material.
Skin materials usually refer to default or common player skin textures. There are also hand textures.
In the case of NPC clothing, sometimes the skin is drawn onto the clothes texture.
But even in the case of a single NPC texture having both clothing and skin, the skin is assigned its own material.
Let's say you have skin materials that aren't changing color. You need to figure out which these are, in the mrl3 file.
"default_tex\skin_BM" seems to be used to change the skin color.
The key to finding the skin materials is searching for the materials that use this texture.
You can do this by counting the number order of textures and then doing a search for materials using that number.
For example, if "default_tex\skin_BM" is 13th in the texture list, its value is 0D. Search for 0D after the material index.
You can figure out where materials start and how long they are, using the mrl3 image I uploaded.
You can also figure out which material is which by what other textures are being used within the same material.
For example, hand textures being used means it's the material used for the hand.
Note that the bytes for location and size are in reverse. For example, in the top right of the mrl3 image, 4002 is the length.
That's 0240 in hex.Write 0240 into Windows calculator (in hexadecimal mode) and then convert to decimal. The result is 576 bytes.
Thus the material size is 576 bytes.Similarly, if location is 1280, that means it starts at 0x00001280.
Once you figure out which materials are skin materials, simply copy paste the green "skin ID" section from the confirmed skin material of a player mrl3.
Using the image I've uploaded, you should be also able to do things like append materials to the end of the mrl3 file and then edit address and size references for existing materials to point to the appended material. Note that you must keep the material IDs (I'm assuming that's what they are based on a video of a RE6 mod tool by MarioKart64n) so that the model knows which material you are referring to. The game will probably crash otherwise.
How to topless (no texture, ie. nipples are missing):
Open f_body501_000.mod3 in a hex editor, and replace 0x000066F0 to 0000673F and 0x00006790 to 000067DF with 00 bytes.
That should remove the shirt. Removing the shorts leaves a gap.
I'm not going to make a topless texture (lazy), so go ahead and make one if you want.
演示截图:
资源查找:
最新文章
点击热榜
推荐问答
- [问答]情商课一般几岁孩子去学比较好?
- [问答]怎么看自己孩子情商低不低?孩子情商低的10大特征是真的吗?
- [问答]我想提高情商和说话要看什么书?
- [问答]顾三月情感课程pdf谁有?
- [问答]谁有情感培训课程资源?
- [问答]如何看卖情感课程正规还是不正规?
实时热榜
回复区
昵称:
邮箱:
内容: